Eclipse Tutorial
This tutorial shows how to set up Eclipse IDE with Remove VM launcher for development with pi4j on Raspberry Pi. It pretty much applies to any (potentially headless) Linux machine and any Java framework.
Getting Eclipse
If you already have Eclipse IDE installed on your machine skip this paragraph. Any Eclipse version (given it can compile Java 7 or bigger if used with RPi or at least Java 6 otherwise) or packaged solution would do.
Do get Eclipse IDE download it from Eclipse Downloads site. I personally prefer "Eclipse IDE for Java Developers". After unziping it (or extracting tgz archives in case of OSX or Linux target OSes) you'll end up with "eclipse" directory and Eclipse executable in it ("eclipse.exe", "Eclipse.app" or just "eclipse" depending on OS. To use Eclipse just start the executable!
Getting Remove VM
To get Remove VM follow Downloads link. From there, download Remote Agent and the Client jar files.
Remote Agent jar should go to the RPi. You can send it there using, for instance, scp (from OSX or Linux) or
WinSCP (from Windows). It is enough to leave jar file in the
Raspberry Pi's home directory. For simplicity, let's suppose you renamed it to just simply:
removevmlauncher-agent.jar (dropping version and revision numbers from the file name).
Client jar file can be renamed in the similar way to just removevmlauncher-client.jar.
Getting pi4j
To get pi4j follow direct download link. From there, download the latest version. At the time this page was written it was pi4j-1.0-SNAPSHOT.zip.
Unzip the archive and locate lib directory. From there you'll need all jar files except
junit.jar.
Setting Up Project
Now, start Eclipse and create new project:
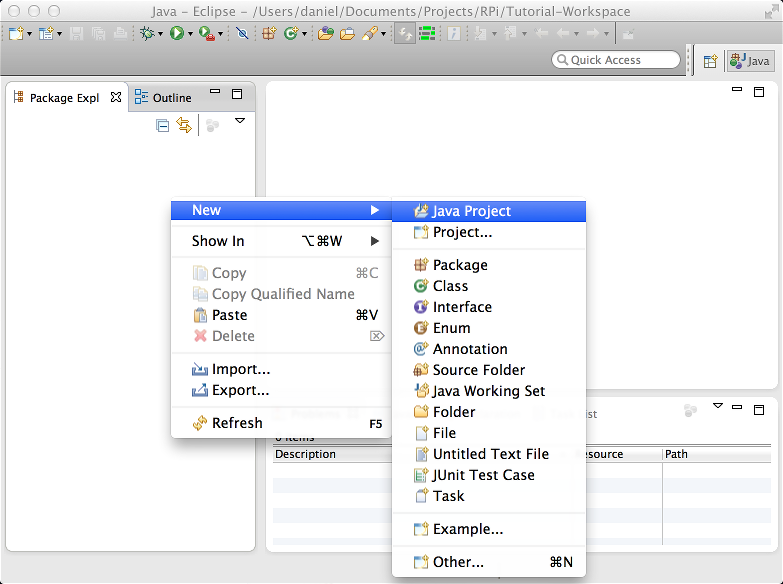
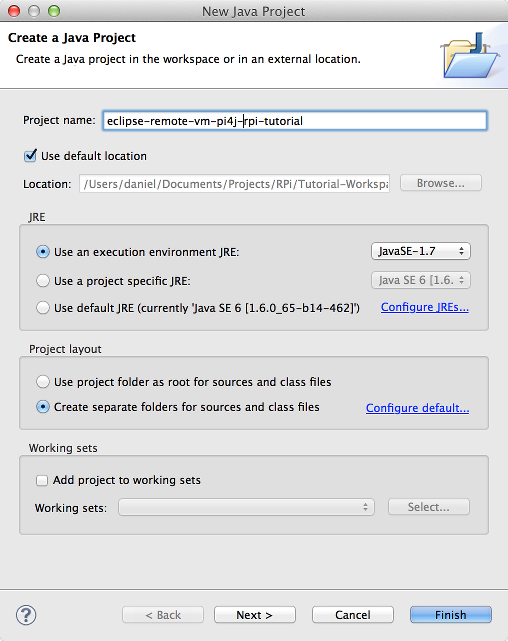
Let's name it eclipse-remote-vm-pi4j-rpi-tutorial:
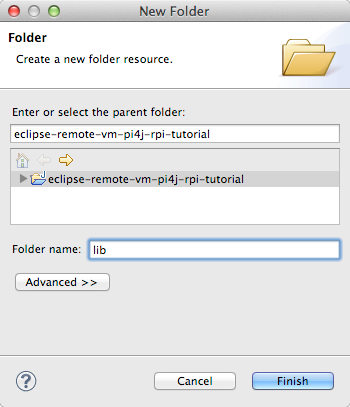
Then, create new folder named lib:
And drag and drop jar files from pi4j's lib directory to it:
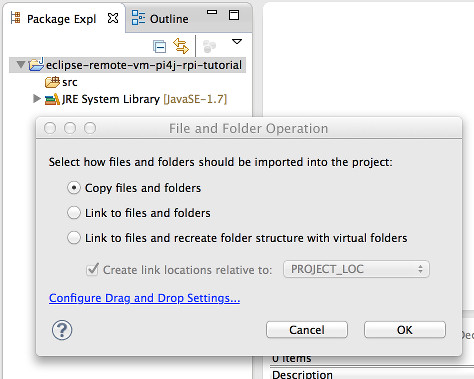
Do the same with remotevmlauncher-client.jar Remove VM's jar file.
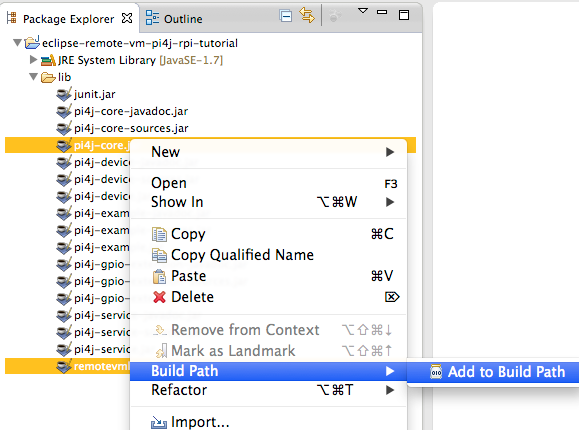
Last step is to add pi4j-core.jar and remotevmlauncher-client.jar from lib
directory to the build path:
GPIO Example
Now we can type in GPIO example (which is directly taken from: Simple GPIO Control using Pi4J).
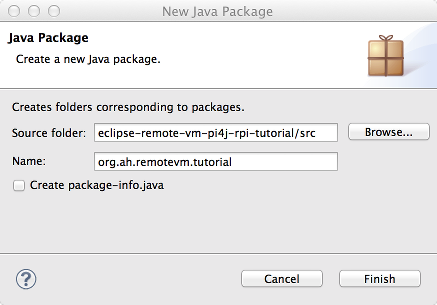
First we create new package "org.ah.remotevm.tutorial":
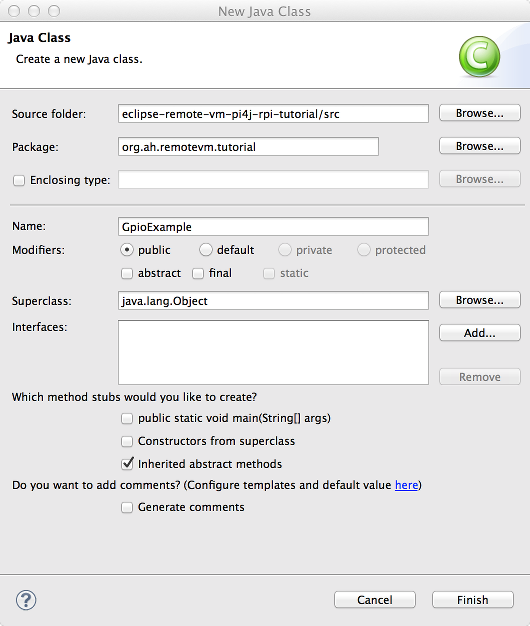
and create new class "GpioExample":
Here's class code:
package org.ah.remotevm.tutorial;

import com.pi4j.io.gpio.GpioController;
import com.pi4j.io.gpio.GpioFactory;
import com.pi4j.io.gpio.GpioPinDigitalOutput;
import com.pi4j.io.gpio.PinState;
import com.pi4j.io.gpio.RaspiPin;

public class GpioExample {

	public static void main(String[] args) throws Exception {
		System.out.println("<--Pi4J--> GPIO Control Example ... started.");
		final GpioController gpio = GpioFactory.getInstance();
		final GpioPinDigitalOutput pin = gpio.provisionDigitalOutputPin(
				RaspiPin.GPIO_01, "MyLED", PinState.HIGH);
		System.out.println("--> GPIO state should be: ON");
		Thread.sleep(5000);
		pin.low();
		System.out.println("--> GPIO state should be: OFF");
		Thread.sleep(5000);
		pin.toggle();
		System.out.println("--> GPIO state should be: ON");
		Thread.sleep(5000);
		pin.toggle();
		System.out.println("--> GPIO state should be: OFF");
		Thread.sleep(5000);
		System.out.println("--> GPIO state should be: ON for only 1 second");
		pin.pulse(1000, true);
		gpio.shutdown();
		System.out.println(" Finishing");
	}
}
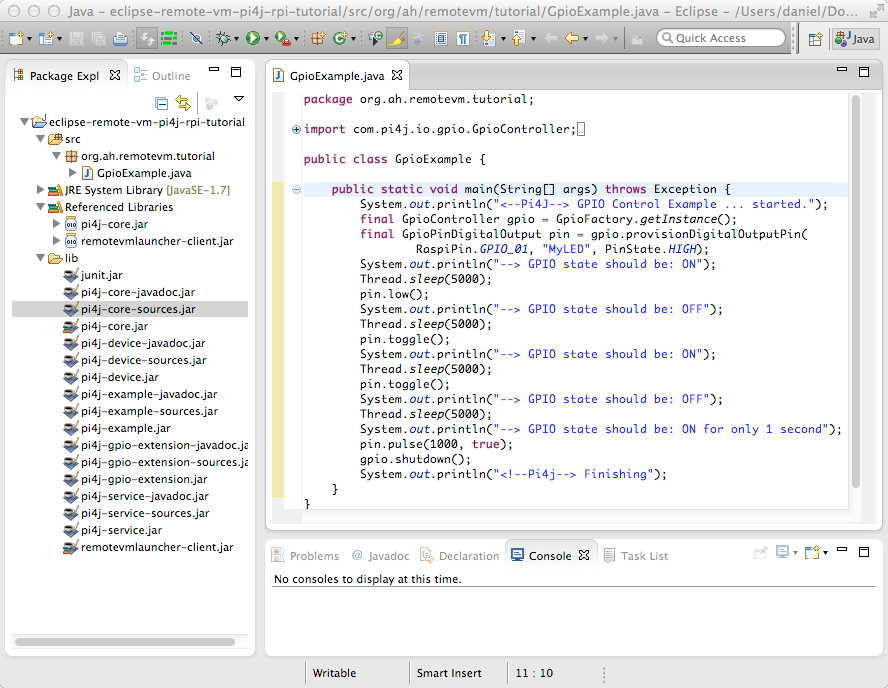
You should have something like this:
Starting Remove Agent
To be able to start Java code on the remote Raspberry Pi you need to log in to Raspberry Pi and from command prompt start remote agent:
sudo java -jar remotevmlauncher-agent.jar -d 1
The Remote Agent needs to be started with admin privileges (sudo command) as pi4j access to GPIO relies on it. After you started it you should see something like this:
pi@raspberrypi ~ $ sudo java -jar remotevmlauncher-agent.jar -d 1
Starting agent at 0.0.0.0/0.0.0.0:8999
That means your Raspberry Pi is ready to accept requests to create new JVMs on demand and
execute code sent to it. Output from your code will be sent back to Eclipse Console and
here in shell of Raspberry Pi you'll just see a few messages regarding invocation. If you
want to see more use "-d" parameter with values 2, 3 or 4 for
most verbose output.
Creating Eclipse Launch Configuration
Lets create run configuration. First select "Run Configurations..."
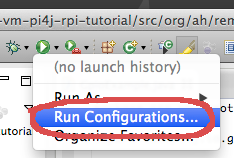
and then create new "Java Application":
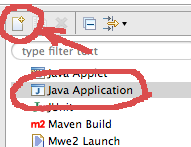
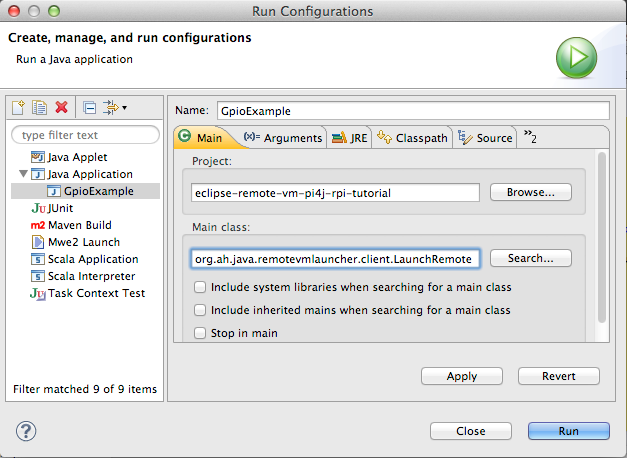
On the first tab, "Main" select text from "Main Class" field and replace it with:
org.ah.java.remotevmlauncher.client.LaunchRemote:
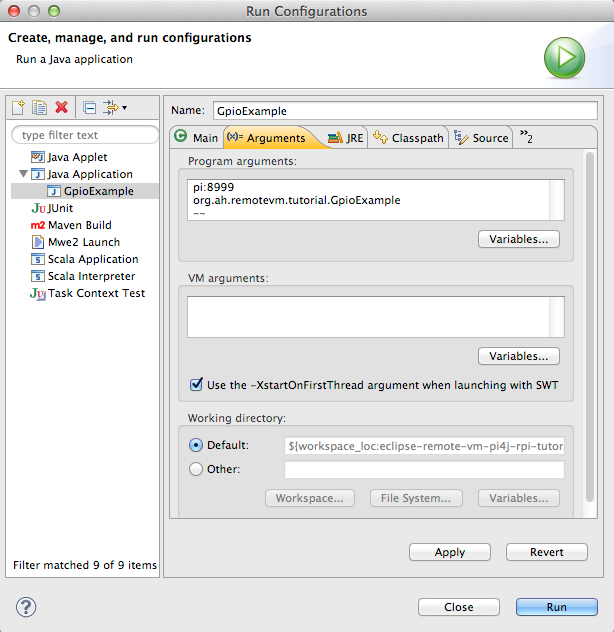
On the second tab, "Arguments" in "Program Arguments" put
pi:8998
org.ah.remotevm.tutorial.GpioExample
--
Where first row is your Raspberry Pi's host name or IP address followed with colon and port. Default port is 8999.
Second line is your main class name, followed with "--". After "--" you can specify your program arguments, one argument per line.
All should look like this:
org.ah.java.remotevmlauncher.client.LaunchRemote:
Running Example
Now select "Run" button in bottom right corner of the "Run Configuration" window
and after a short delay (a few seconds for Raspberry Pi's side, the Remote Agent, to download needed jar files,
class files and other resources) you should see the output from the GpioExample Java main class back to Eclipse's
console window:
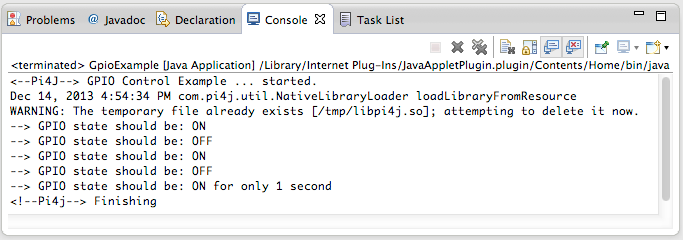
Now, each time you change your Java project, classfiles, etc, Eclipse will automatically recompile everything
(on save) and you'll be able to run it instantly using "Run" button from Eclipse toolbar:

Delay in subsequent runs should be much lower as main jar files are already transferred to Raspberry Pi
(in our case to "~/.remotevm/org.ah.remotevm.tutorial.GpioExample") and only
changes are passed to Raspberry Pi again. In case you make a mistake and want to stop execution of Raspberry
Pi's code - all you need to do is to stop on on Eclipse side. For instance using "Stop" button
in console window:

Clean Up
To finish working with this setup (for the day, for example), all you need is to type "Ctrl-C" in ssh window and the Remote Agent will stop. Next time all you need is to start the agent again
sudo java -jar remotevmlauncher-agent.jar -d 1
and continue with development. If you want different main class to be started, just remember to create
new launch configuration and to set that class name in the second line of arguments to
org.ah.java.remotevmlauncher.client.LaunchRemote.
Further Important Points
-
Each new launch configuration must have
remotevmlauncher-client.jarin classpath. You can add it to the project's classpath or only to launch configuration - it doesn't matter (even though second one is more correct). -
org.ah.java.remotevmlauncher.client.LaunchRemoteis main class of each launch configuration. Main class is second argument of the "Arguments" tab. - First line in the "Arguments" tab is Raspberry Pi's (or remote machine's) address and port. Default port is 8999.
- After main class there must be "--" in separate line and after that can follow your main class arguments. One argument per line.
-
If you want to add "arguments to the client launcher (
org.ah.java.remotevmlauncher.client.LaunchRemote) add it before the "first" line. For list of all arguments put only "--help" for list of arguments. -
If there's a jar file (or any other classpath segment) needed and provided only on the remote system, you can
use "--remote-classpath" argument. Repeat argument and many times as classpath entries you need to add.
For Example:
--remote-classpath
/home/pi/my-extra.jar
--remote-classpath
/home/pi/remoteonlyproject/target/classes
mypi:8999
com.something.MainClass
--
arg1
arg2
-
You can change port (or interface address) it operates on with "
--listen" argument on the remote side. For instance:sudo java -jar remotevmlauncher-agent-1.0-SNAPSHOT.jar --listen 127.0.0.1:8888 -d 1
Debugging Remote Application
To debug remote application you could add following arguments to your launcher:
--remote-debug-port
8000
--remote-debug-suspend
pi2:8999
org.ah.remotevm.tutorial.GpioExample
--
